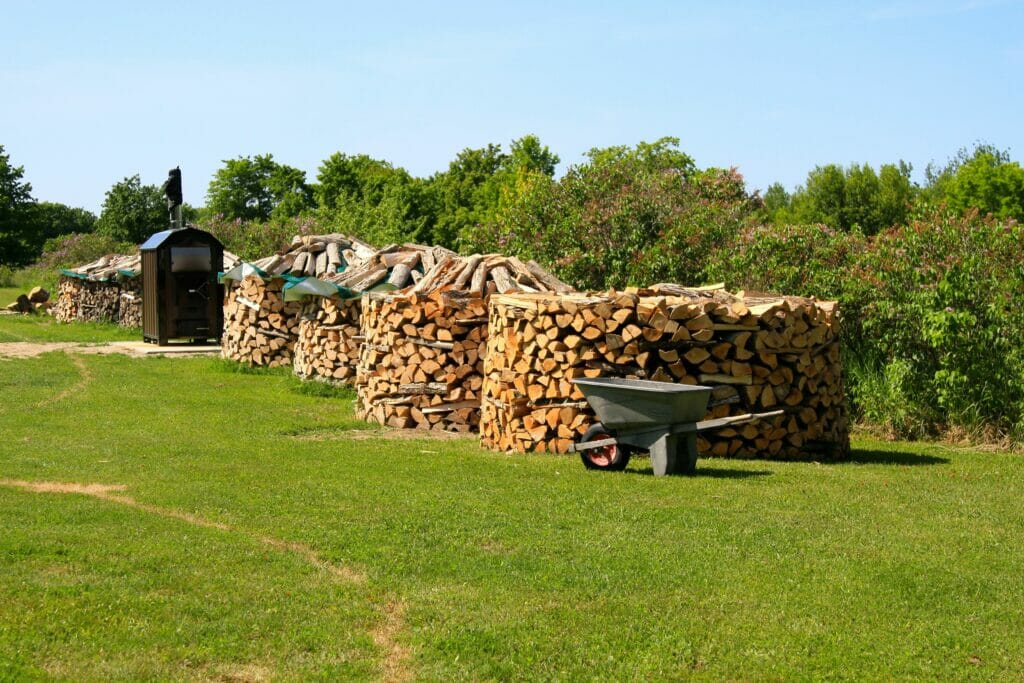
A big part of heating well with wood is proper wood storage, and how you stack firewood is more important than you might think. I’ve been heating with wood since 1989, and 10 years ago my son, Robert, and I started stacking wood in round, outdoor piles. It’s better than straight piles and the best method I’ve seen so far for specific reasons.
On the other side of the Atlantic, Scandinavians have been taking wood heat seriously for centuries longer than we have. They also stack wood in round piles. Curious about why, I gave my own version of round stacking a try. That’s what got me into it. I now know that round piles take less time to stack, they shed water better than straight piles, they’re more stable and they look better.
We live on Manitoulin Island, Ontario, and like many places in Canada with easy access to firewood, we rely on our wood piles from October to May. This is not recreational wood burning to cheer up the living room on a Sunday evening. We have fires burning constantly for almost half the year in two houses on our rural property, and this means we need to be efficient about handling wood. The biggest attraction of round wood piles for us is that it takes so much less time to stack than straight piles because there’s so much less actual stacking going on.
Start by laying out your round pile with a 1.5-metre (five feet) piece of cord that has a loop in one end. Push a metal spike into the ground where you want the centre of the pile to be, slip the loop over the end of the spike, then pull the cord tight and use the end to guide placement of the outside ends of the logs making up the bottom layer of wood. It’s like you’ve made a big compass. Stack wood directly on the ground wherever the end of the cord lands. Keep stacking and checking several layers around the perimeter of the circle, then remove the stake and rope. As you work your way up, fill the centre of the circle with randomly thrown-in pieces of wood, then build more wall when you’ve filled the centre portion, tilting the wall inward slightly for stability as you go up. Add three or four wooden poles across the diameter of the circle when you’re about a metre (three feet) up to bind the pile together. Without these poles, your wood “walls” can bow outwardunder the pressure of the wood thrown inside, collapsing before spring arrives.
When Robert and I cut wood, we throw the split blocks into the loader of our ancient tractor directly from the wood splitter, drive over to the pile we’re working on, then dump the load directly into the centre. We pull the nice blocks out around the perimeter of the pile as needed to build the outer wall, with the rest of the blocks simply staying in the middle in a jumble. This way we only end up handling and stacking about a third of the pieces in the pile. You don’t need a loader to stack in the round, but round piling does let you make good use of a loader if you’ve got one.
As your pile rises, you’ll find that the outer layers of wood in the wall begin to slope outward. This is opposite to the inward slope that you want, but it’s easy to counteract. Whenever your pieces of wall wood begin to tip outward, place a piece of wood so the edge is on the outside of the pile, not the end. Pieces of wood piled on top will now tilt inward for a while.
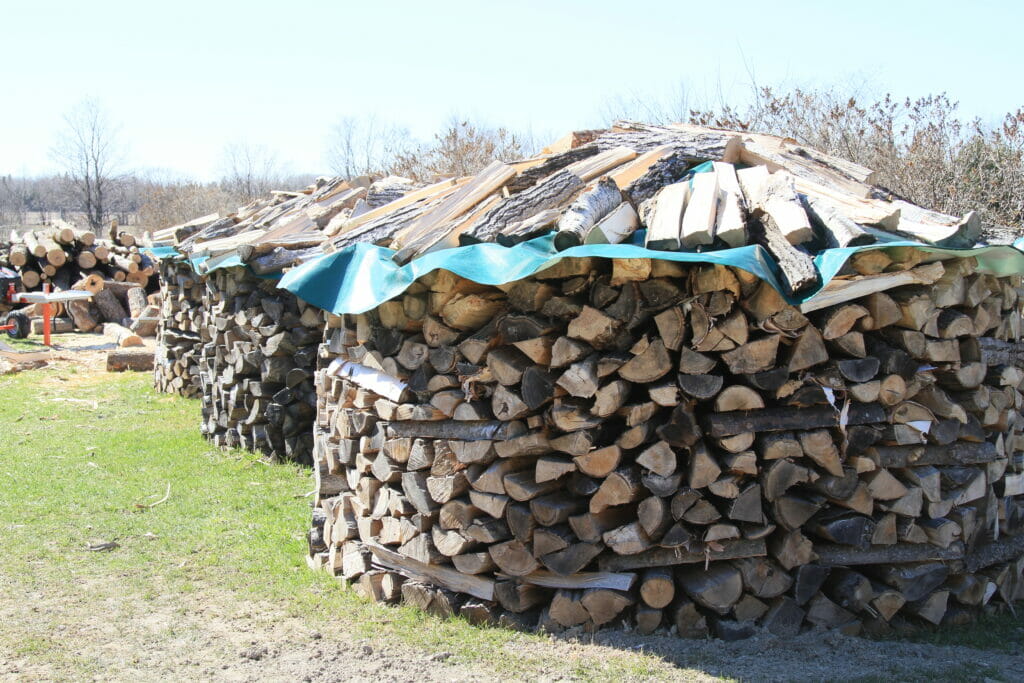
When winter comes and you’ve used up the contents of a pile, leave the lower layer of wood in place. It’ll act as a guide for rebuilding the pile next time you’re cutting wood. Besides, the bottom layer of wood picks up quite a bit of moisture, so you might as well leave it on the ground. We make our piles about two metres (seven feet) high, but whatever finished height you want, dome the top of the pile as you get there, then place a tarp under the last layer of wood for shelter. The tarp sheds water, but it’s completely hidden and held down by that last layer of wood. I have round tarps made of heavy waterproof fabric especially for this purpose, but a regular tarp is fine as long as you tuck in the edges.
It’s easy to build round piles so they don’t fall down, easier than building stable square piles. And though it’s hard to quantify, wood seems to dry more quickly in round piles, too. Part of this is probably due to the fact that it’s so easy to use a tarp to effectively shelter a round pile. Height is the reason why. A taller pile means that a smaller tarp shelters more of a given volume of wood. Wind blows through the sides of the pile to carry moisture off quickly.
Besides practicality and cost savings, I like heating with wood because the whole process has a beauty about it that nothing else can match. While plentiful and sustainable wood heat is great, a well-stacked round firewood pile is gorgeous to the eye. At least that’s what people driving by our place tell us.
Give it a try and see for yourself.
Related posts:


Steve Maxwell and his wife Mary live on a 90-acre modern homestead on Manitoulin Island, Ontario in a stone house they built with local materials beginning in 1985. Steve is Canada’s longest-running home improvement and how-to columnist and editor of Home and Property. He divides his time working on the land, building things large and small, and creating articles and how-to videos that teach sustainable, self-reliant, hands-on living skills.