This works-every-time design I use for every gate installation.

Gates are often a big part of rural life, and I’ve learned a thing or two about building and installing them on my homestead over the last 3 decades. And while there are many different gate designs to choose from, how many do you really need? For me, just one design is all I use for every gate installation I need.
In this article, I’ll touch on the main things to consider as you plan and build a great gate installation in the real world, using hardware and methods that are simple and accessible.
“Building a gate installation properly is a serious amount of work, so don’t expect to get it done in an easy afternoon. Take your time, get the details right, and you’ll enjoy great gate performance for several decades.”
STEVE MAXWELL
ALL FARM GATES NEED TO BE ABLE TO DO THREE THINGS:
- Open, close and lock easily.
- Withstand large animals challenging the gate.
- Resist rot and deliver real-world reliability, year after year.
Assess Whether You Need Gate Posts or Cribs
Where I live, there may or may not be enough soil above bedrock in a given spot to properly anchor a gate post, so soil depth is the first thing you need to think about. How much soil is enough to support a gate post? There are two things to consider: frost penetration in winter, and mechanical strength required to resist the forces on the gate post. Soil depth is necessary for a gate post. When it comes to the strength of gate posts in soil, 30 inches of soil depth is the minimum for a post supporting a large gate. The thing is, where I live this is not deep enough to prevent frost from getting underneath the post during winter and moving it upward a little each year. In time, this frost heaving will cause the gate post to fail, so take gate post depth seriously.
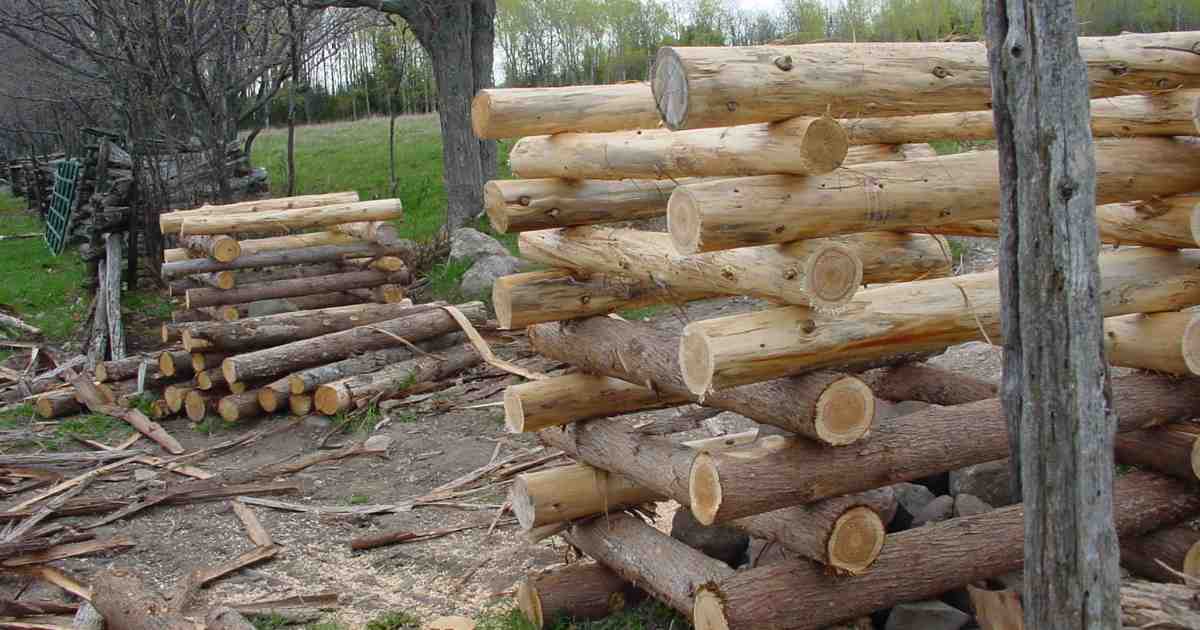
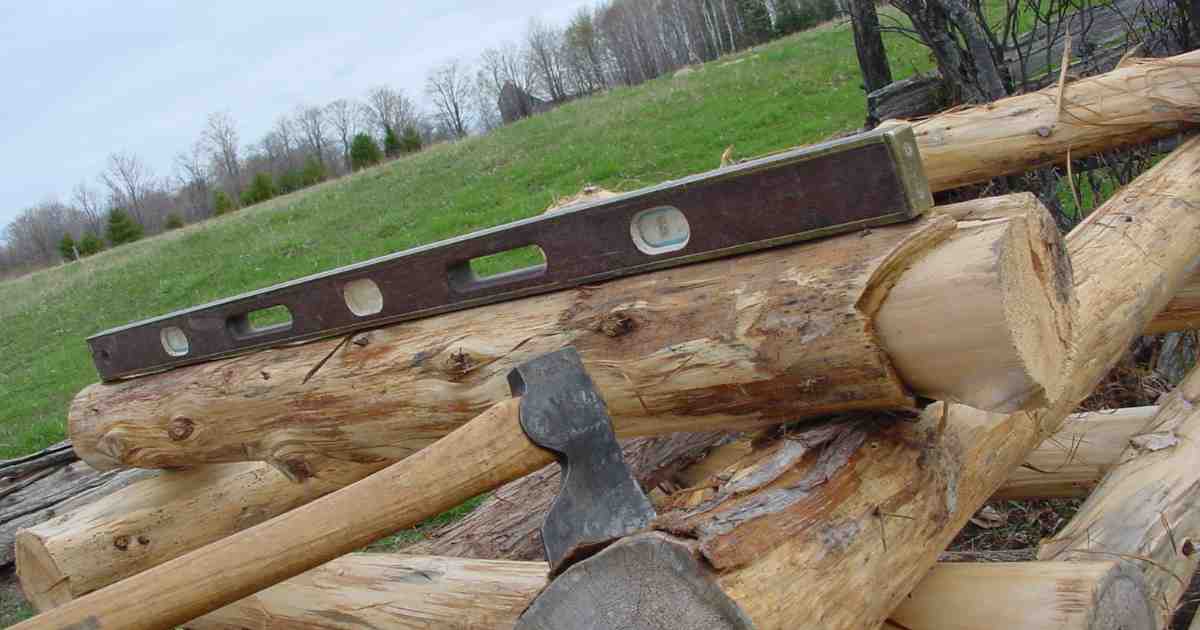
Here at my place, I set gate posts and fence posts down 40 inches and all is well. Cribs are used when there is insufficient soil depth. If there isn’t enough soil depth above bedrock to support a gate post, building a wooden crib is the most common solution. Cribs are criss-cross assemblies made of rot- resistant wood (small eastern white cedar logs where I live), with the middle of the crib filled with fieldstone for stability. Cribs can be built directly on bedrock or on soil that’s not deep enough to support a post. Use a level to keep
the corners plumb as you add additional layers to the crib, with a single 12-inch galvanized spike driven into each corner with a sledge hammer to fasten new logs down.
Decide Whether to Make or Buy a Gate
What to know when buying a gate: My favourite manufactured gate is the Diamond Bar brand, made of square steel tubing. My oldest steel gate is more than 30 years old and still works perfectly. All the gates I’ve
bought come as painted steel, but the more rare, galvanized versions of the Diamond Bar are better in my book. If your local farm store doesn’t carry these galvanized gates, ask about ordering. Galvanized is useful because you’ll never have to paint your gates to keep them from rusting.
There’s nothing like the zinc coating of galvanization to stop rust almost forever. The best steel gates I’ve seen are particularly strong because the square steel tubing they’re made of is oriented diagonally. Beware of other kinds of common galvanized gates, particularly the kind made of thin-walled round pipe. These are quite a bit lighter in weight and weaker than gates made of square steel tubing.
What to know when making a gate: A nice wooden gate is more beautiful than a steel one, and it will cost you less out of pocket for materials than a steel gate would. That said, you should consider a few drawbacks before you decide whether to make or buy a gate.
First, even if you build using rot-resistant wood, no wooden gate will last more than 20 years of typical farm use. Often less. Also, standard thicknesses of lumber are less than ideal for gates. Three-quarter-inch-thick lumber is way too thin for any farm gate over, say, 5 feet wide, while the next standard lumber size up (11⁄2 inches thick) is too hefty even for a 16-foot gate. The ideal thickness of lumber for a typical farm gate is 11⁄4
inches, which you’ll need to have custom-sawn at a mill.

How Wide Should a Gate Be?
Farm gates come in lengths from 2 feet to 20 feet long, but in most cases you’ll want something between 10 feet and 16 feet. Here at my place, I use 16-foot-wide gates almost exclusively between fields. Sixteen feet is not so wide that it’s a huge pain to open, but it’s wide enough for most equipment to pass through.
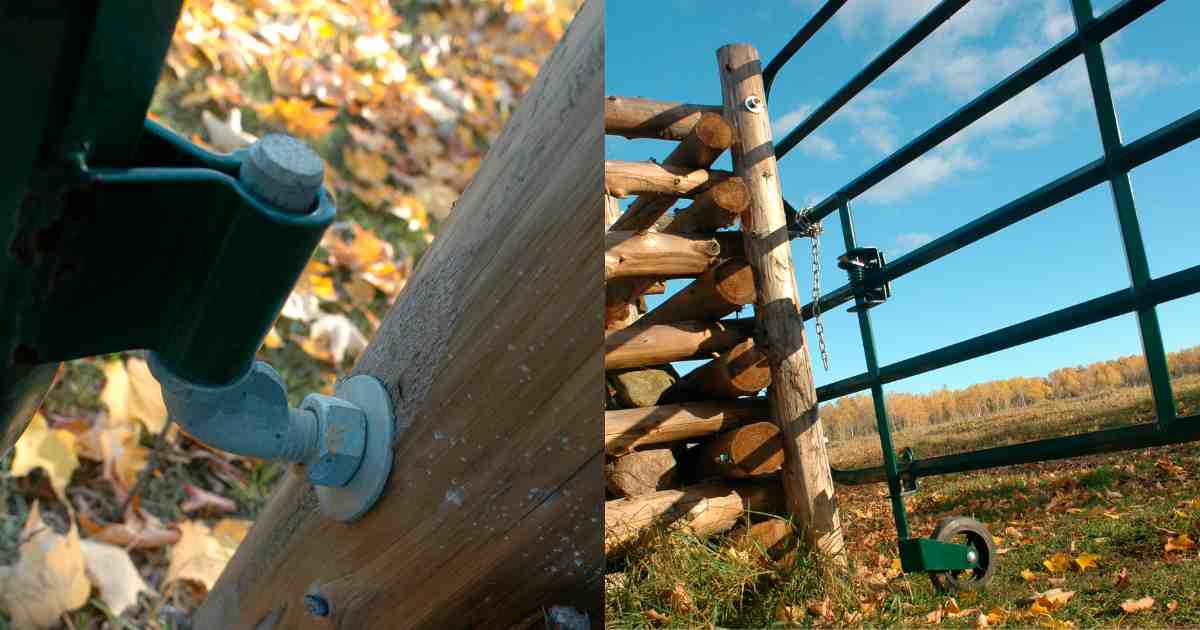
Take your time to install the gate with precision Consider the gate swing direction first. Do you want a gate that opens in both directions or just on one side of the installation? I prefer a one-way opening because that lets me support the gate on a big lag bolt driven into the fence post when it’s closed. In this case, the space between the posts/cribs would be 6 to 8 inches less than the length of the gate, so the gate closes against the post. If you’d like a gate that swings open in both directions, then you’ll need to make the space between the posts/cribs 3 or 4 inches wider than the length of the installed gate as it swings on hinges. You will need to allow for that extra 3 or 4 inches because after the gate is installed, the hinges will move the gate back inward from the post by that distance.

Make a template. Lay your gate down on the ground as you mark precise locations for your posts or cribs. It’s always best to use the actual gate as a kind of full-size template, rather than relying on error-prone measurements and math to determine gate post spacing.
Install the hinges. Gates should be level after installation for the best appearance and function, and I like to place the gate on logs or blocks or something to get it up off the ground and in position for marking the hinge locations on the gate post. The angle of the gate can be adjusted by changing how much each hinge bolt sticks out from the posts, but you want to bore hinge holes as close to ideal as possible.
Add a support wheel and galvanized lag bolt. The hardest thing that can happen to a gate installation is the weight of the gate hanging on the hinges all the time. The leverage against the post and hinges is tremendous and can cause your installation to go wonky too soon. This is why I like wheel supports for gates. These support the gate as it swings open and closed. To support the gate when it’s completely closed, I install a 5⁄8-inch-diameter galvanized lag bolt into the fence post. Just lift the gate up a bit as it’s being closed, then rest the gate down on the bolt.
Tools for Gate Work
CHAINSAW – For cutting fence posts and crib logs to length. A small model is all you need because cutting is light and intermittent. One of the new cordless chainsaws is perfect for this work.
POST HOLE AUGER – This is for boring holes if you have enough depth of soil for posts. Tractor-mounted models are the easiest to use, but portable gas-powered augers are an option, too. A long-handled shovel, a
pry bar and a clamshell scoop are hand tools that work. I’ve dug dozens of fence post holes by hand like this, and it is an option if you have more time than money.
TAPE MEASURE AND 48-INCH LEVEL – The tape measure is essential for spacing the gate posts or cribs and for cutting parts. The level lets you orient the posts/cribs so they’re straight up and down (plumb).
CORDLESS DRILL AND AUGER BITS – Boring big holes through fence posts is necessary for every gate installation job. A few sizes of self-feeding auger bits make quick work of creating holes for hinges and other hardware. Any good 18- or 20-volt cordless drill, set to low range, can handle 1⁄2-, 5⁄8- or 3⁄4-inch-diameter auger bits.
HAMMER, SLEDGE HAMMER, SAFETY GLASSES – You’ll need these much more if you’re building cribs, but you’ll still need something to pound things into place if you’re using gate posts.
Related posts:


Steve Maxwell and his wife Mary live on a 90-acre modern homestead on Manitoulin Island, Ontario in a stone house they built with local materials beginning in 1985. Steve is Canada’s longest-running home improvement and how-to columnist and editor of Home and Property. He divides his time working on the land, building things large and small, and creating articles and how-to videos that teach sustainable, self-reliant, hands-on living skills.