As a Harrowsmith reader, you probably have at least a passing interest in hands-on skills for creating and repairing things in your life. And the first step to making skills a bigger part of your situation involves creating some kind of work space. It needn’t be fancy, just effective. Let me show you what works in my experience, beginning with true examples of how a work space can be created in many different ways.
Work Spaces Everywhere
I’ve had some kind of home workshop space on the go for more than 40 years, and these spaces have helped me make beautiful and useful things over the years, plus do extensive repairs. Besides being fun, a good work space and the tools you’ll use in it can make financial sense if you manage things properly.
My first work space was in the furnace room of my parents’ basement during my high school and university years. This “workshop” was less than 200 square feet in size, but it worked well for the woodworking I was doing at the time. In the end that little space let me earn most of my university tuition building furniture for a handful of repeat customers.

The Shed Shop
My next space was even smaller. I call it my “shed shop,” It was just one end of a 10×20-foot shed that I built on the house-free land where we began our rural adventure after moving from Toronto to Manitoulin Island, Ontario. My folding cot, a 1953 Frigidaire, a hot plate, and a water jug sat right next to my table saw, mechanic’s tools and chop saw on my workbench/kitchen table. (Yes, there was a time when I slept in a fold-up cot next to my chainsaw, woodworking tools and mechanic’s tools.) Today, the shed is still a valuable part of the homestead. We use
it for storage of all kinds, and I still use the bench for repairs, sharpening chainsaws and other small tasks.
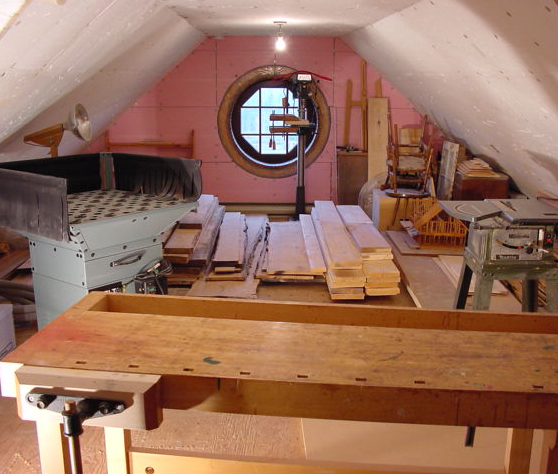
The Attic
After the shed shop came to my attic workshop phase, with my house now mostly built and livable, the walk-up attic was a dry and serviceable workshop space. Though far from convenient for bringing materials up and completing projects down, the attic was the best space I had for working, so I used it for more than ten years. That’s where I built most of the furniture and milled all of the trim for my house.
Two-Storey Workshop
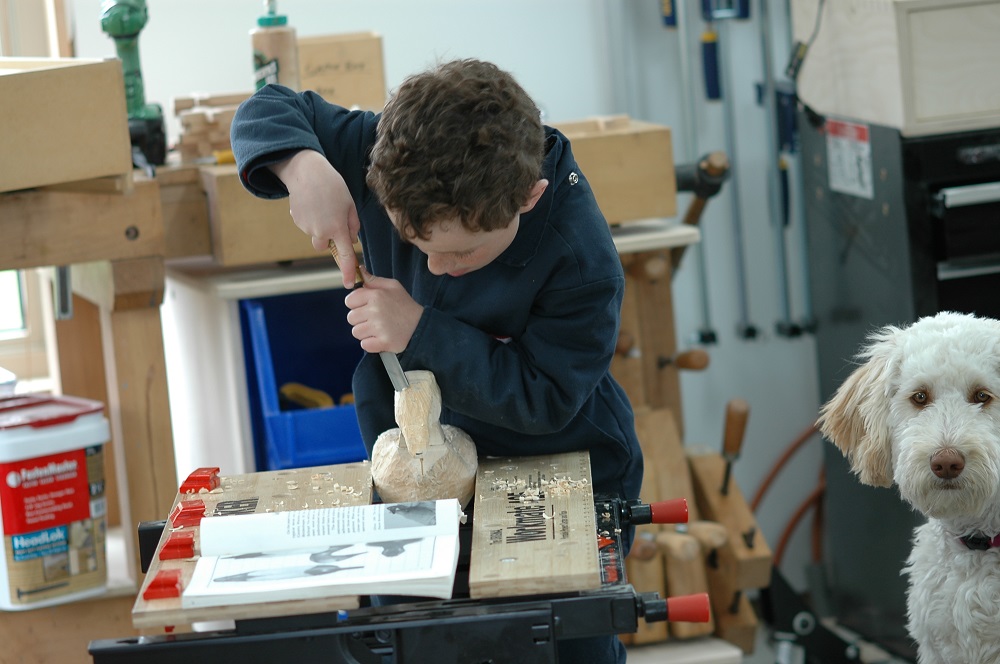
Finally, in 2007, I began constructing a separate, two-storey workshop where I am now. Writing and editing happen upstairs, while woodworking, metalworking, and machine repair happen on the ground floor. The “shop,” as we call it, has been a great place to create and fix, and our kids have also used this space fully.
There is “long-term temporary” asphalt shingle siding on the building, and I plan to replace it with a brick design like this.
I’m telling you all this to convince you that anyone can set up a workshop space. All you need is a personal drive. The most interesting home workspace I’ve heard of was by an ambitious apartment dweller who did hand-tool woodworking on the balcony of his apartment in the evenings after work.

Invest In Your Space
No matter what space you have to get ready for making and repairing things, it’ll need time and money to make it useful during setup and time spent regularly tidying and straightening things. In this case, investment means these things:
• A clean, tidy and well-lit situation: Most spaces used for working need help with organization and lighting, especially at the start.
• Storage spaces for all tools and materials: Shelves, racks and storage boxes are exceptionally good at keeping things neat and tidy, especially when you hope to accomplish a lot in a small space. Almost every bit of wall space in my shop has a shelf, cabinet or rack for storing wood, metal and tools.
• A workbench or rolling workstation is essential, but you needn’t get fancy, especially at the beginning. Suppose this is your first workspace; make-do with homemade options rather than buying solutions to all your challenges immediately. Purchased solutions can come later when reality has taught you the difference between solutions that work and solutions that look like they’ll work. If you’re a beginner, you don’t know enough to make wise purchases, so don’t waste your money.
• Take the long view: Nothing worthwhile in life is ever accomplished quickly, which goes for your home workshop space. For instance, if you decide to buy some wire shelving, consider what type might be easier to move to a larger space someday. Aim to address the best guess of your future needs in a year or two rather than current needs.
Remember That Struggles Teach Lessons
Choosing tools and workshop equipment is one place where many people make mistakes, and the reason is enthusiasm. While enthusiasm is attractive and necessary, enthusiasm can also cause you to buy the wrong kind of tools
in the wrong order. This is where intentionally allowing yourself to struggle with inadequate tools (or none at all) is worthwhile as you start. Don’t struggle forever, of course, but a period of struggle with less-than-ideal tools offers an unbeatable advantage for one simple reason. It lets you come to a complete understanding of the problem so you can more easily recognize tools and equipment that addresses that problem.
“Kaizen” Your Workspace
“Kaizen” is a Japanese word that I like a lot. It means “incremental improvement,” and that’s an excellent way to look at your workspace and how you manage it (and life in general). If you have the workshop bug, I probably won’t have to tell you to continually envision ways to make your space more efficient and more effective. This is the same thinking that moved me from one workspace to another over the years, mostly getting better results each time. You can always do things better, and pursuing “better” can be engaging.
Guidelines for Tool Purchases
While you should struggle without ideal tools until you have a better idea of what really makes sense for you and your work. All this said, I’ve noticed common patterns to tool purchasing.
If your main focus is woodworking, consider these major tools in this order as you develop your skills:
Woodworking Tools:
* Chopsaw
* Tablesaw
* Jointer
* Thickness planer
* Drill press
If metalworking is more your thing, then you’ll probably find this buying order makes sense:
Metalworking Tools:
* Drill press and metal-capable drill bits
* Metal-cutting chopsaw
* Angle grinder
* Bench grinder
* Welder
Reset Saturday
In my experience you need to spent 10% to 20% of the time it takes to tackle most projects cleaning up, organizing and replenishing workshop supplies. The problem is, when you have your heart set on progress, cleaning up is not all that interesting. That’s why I set aside Saturdays for tidying the workshop and dealing with all the loose ends around the property. I can’t always keep up with the advance of disorganization as soon as I’d like, but Reset Saturdays are a big help.
Related posts:


Steve Maxwell and his wife Mary live on a 90-acre modern homestead on Manitoulin Island, Ontario in a stone house they built with local materials beginning in 1985. Steve is Canada’s longest-running home improvement and how-to columnist and editor of Home and Property. He divides his time working on the land, building things large and small, and creating articles and how-to videos that teach sustainable, self-reliant, hands-on living skills.