A home-made, wooden walking stick you whittle yourself will connect you with the walking habit in a more hands-on way. Whittling can also be a lot of fun, even if you’ve never tried it before.
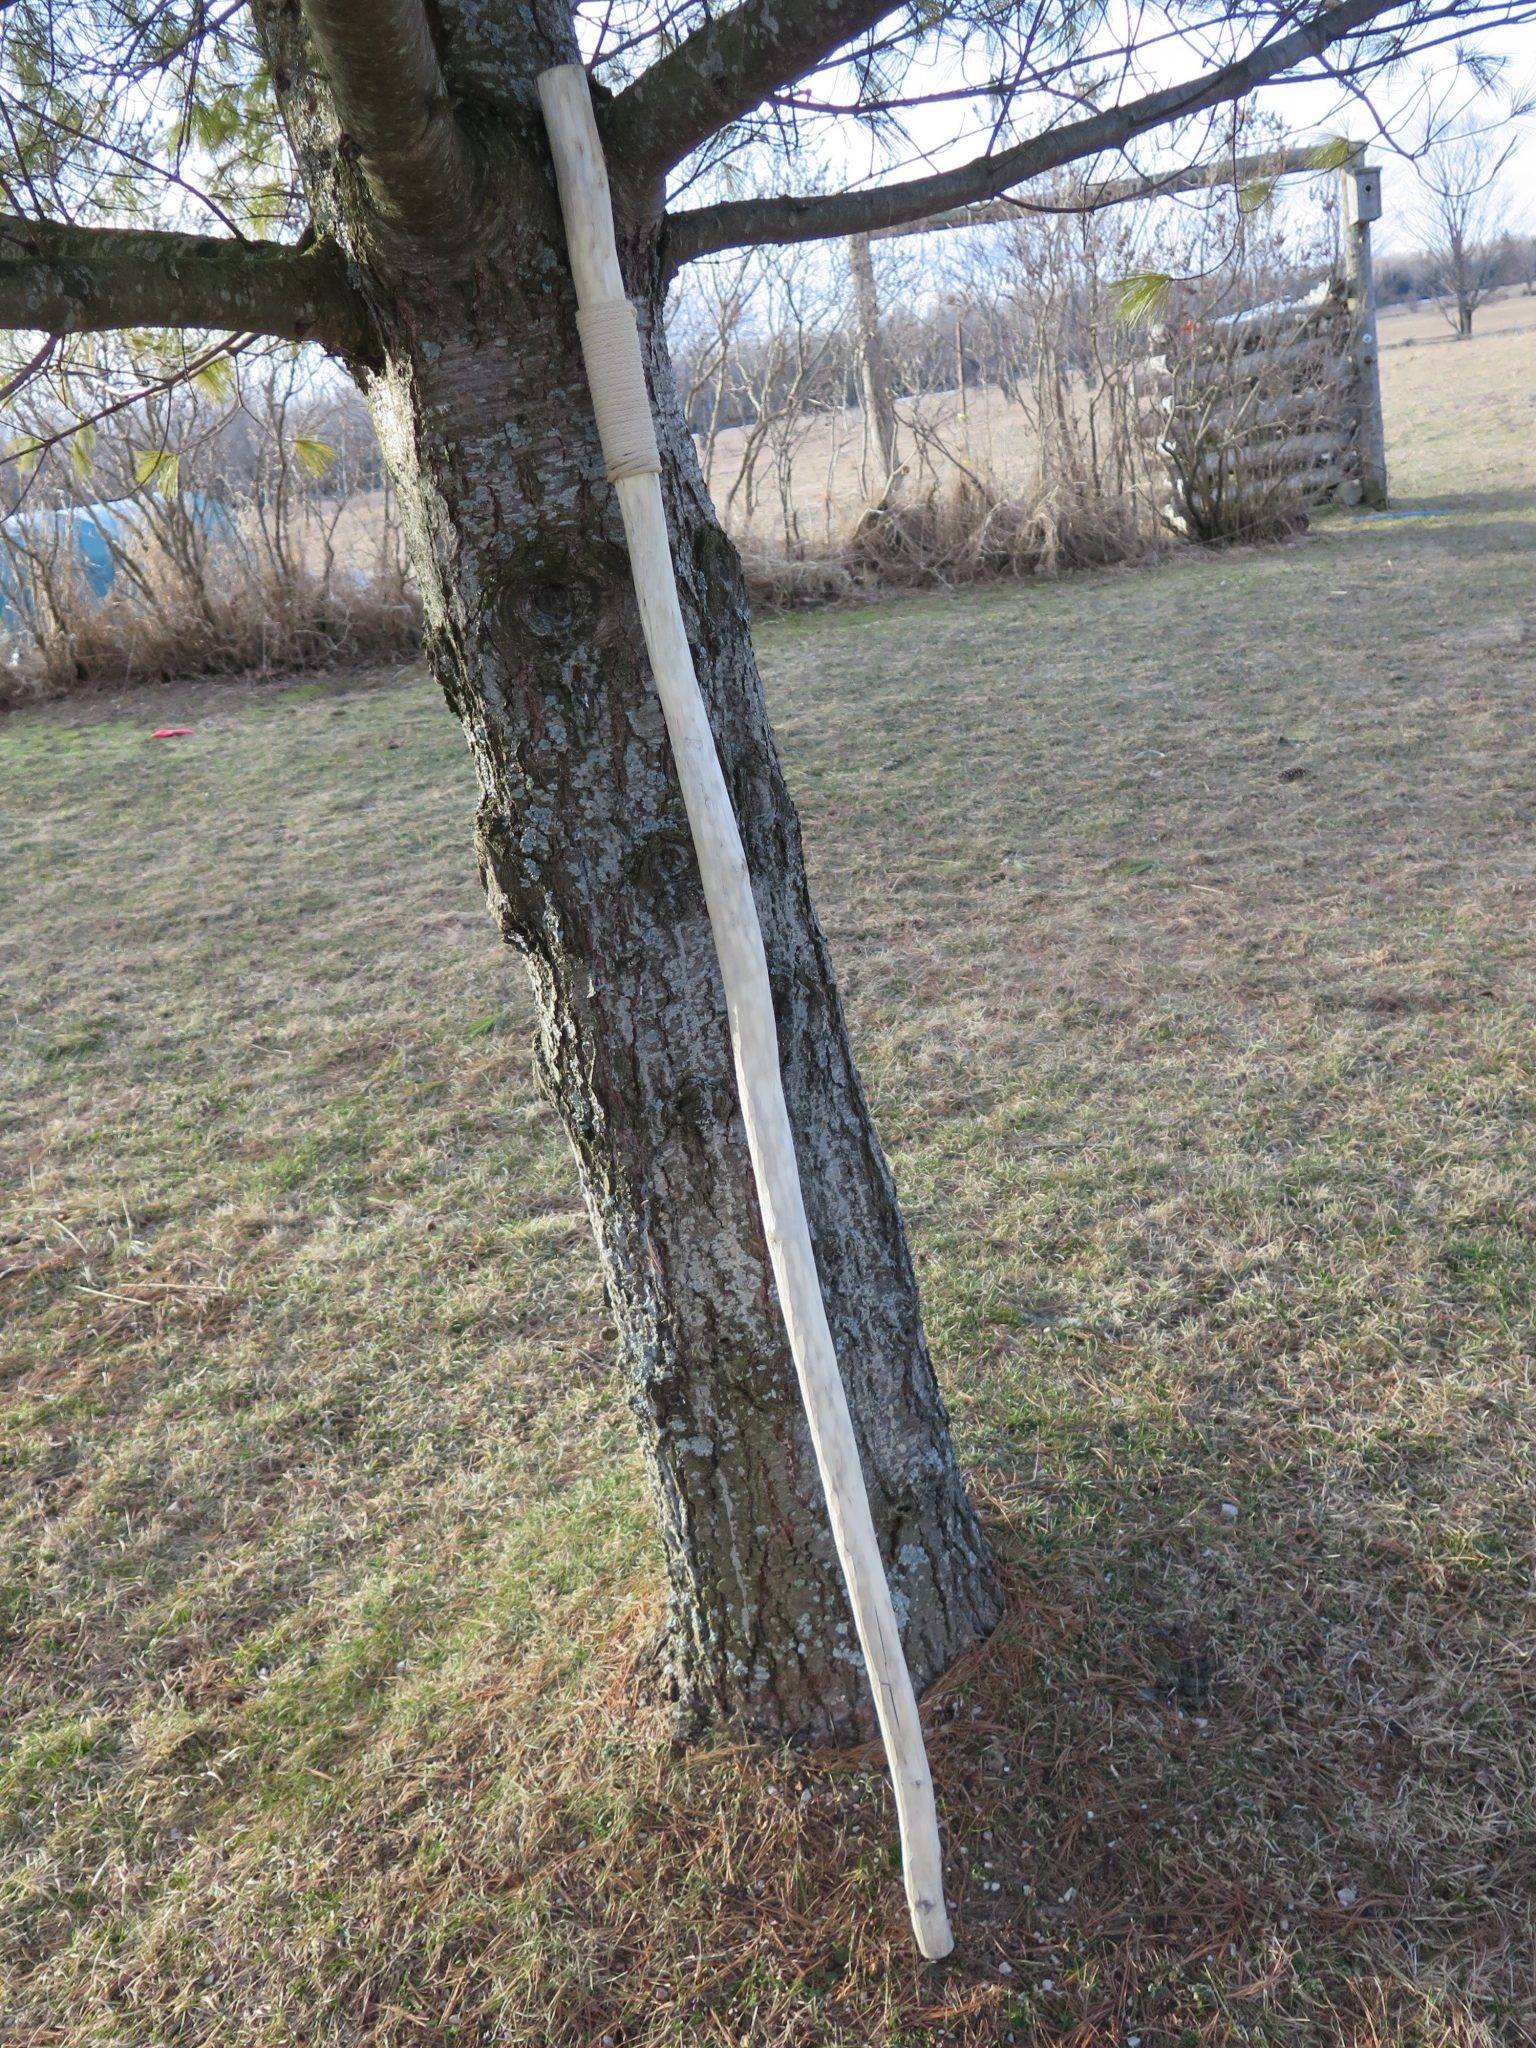
This lightweight, strong walking stick was made from a poplar sapling. No matter where you live in Canada, you can find some kind of wood for whittling a stick.
Canada is covered in the kind of saplings that make fabulous walking sticks. Even if you live in a city, you can still get your hands on a trimmed limb of some kind. Poplar makes excellent walking sticks and poplar trees are one of the most common species across Canada. If prevalence of tree cover had counted for anything when they were choosing our national symbol, the poplar leaf would be on our flag. Maple and most hardwoods make decent walking sticks too, but heavier than poplar. Stay away from pine or spruce if you can because of the sticky sap.
Find a straight sapling or branch that’s 2 1/2” to 3” at the thick end, saw it to 60” or 70” long, then get ready to make shavings. If you’re cutting a sapling from an actual forest, choose one that’s growing close to neighbours. You’ll improve the forest by getting it out of the way.
What kind of whittling knife is best? Beginners love those utility knives with the long, segmented blades you break to expose a fresh point. The best I’ve used for carving is the yellow-handled Olfa HB with its 1”-wide blade. Don’t use anything narrower. You could also use an ordinary jack knife, but you’ll have to be pretty good at sharpening to compete with the utility blade.
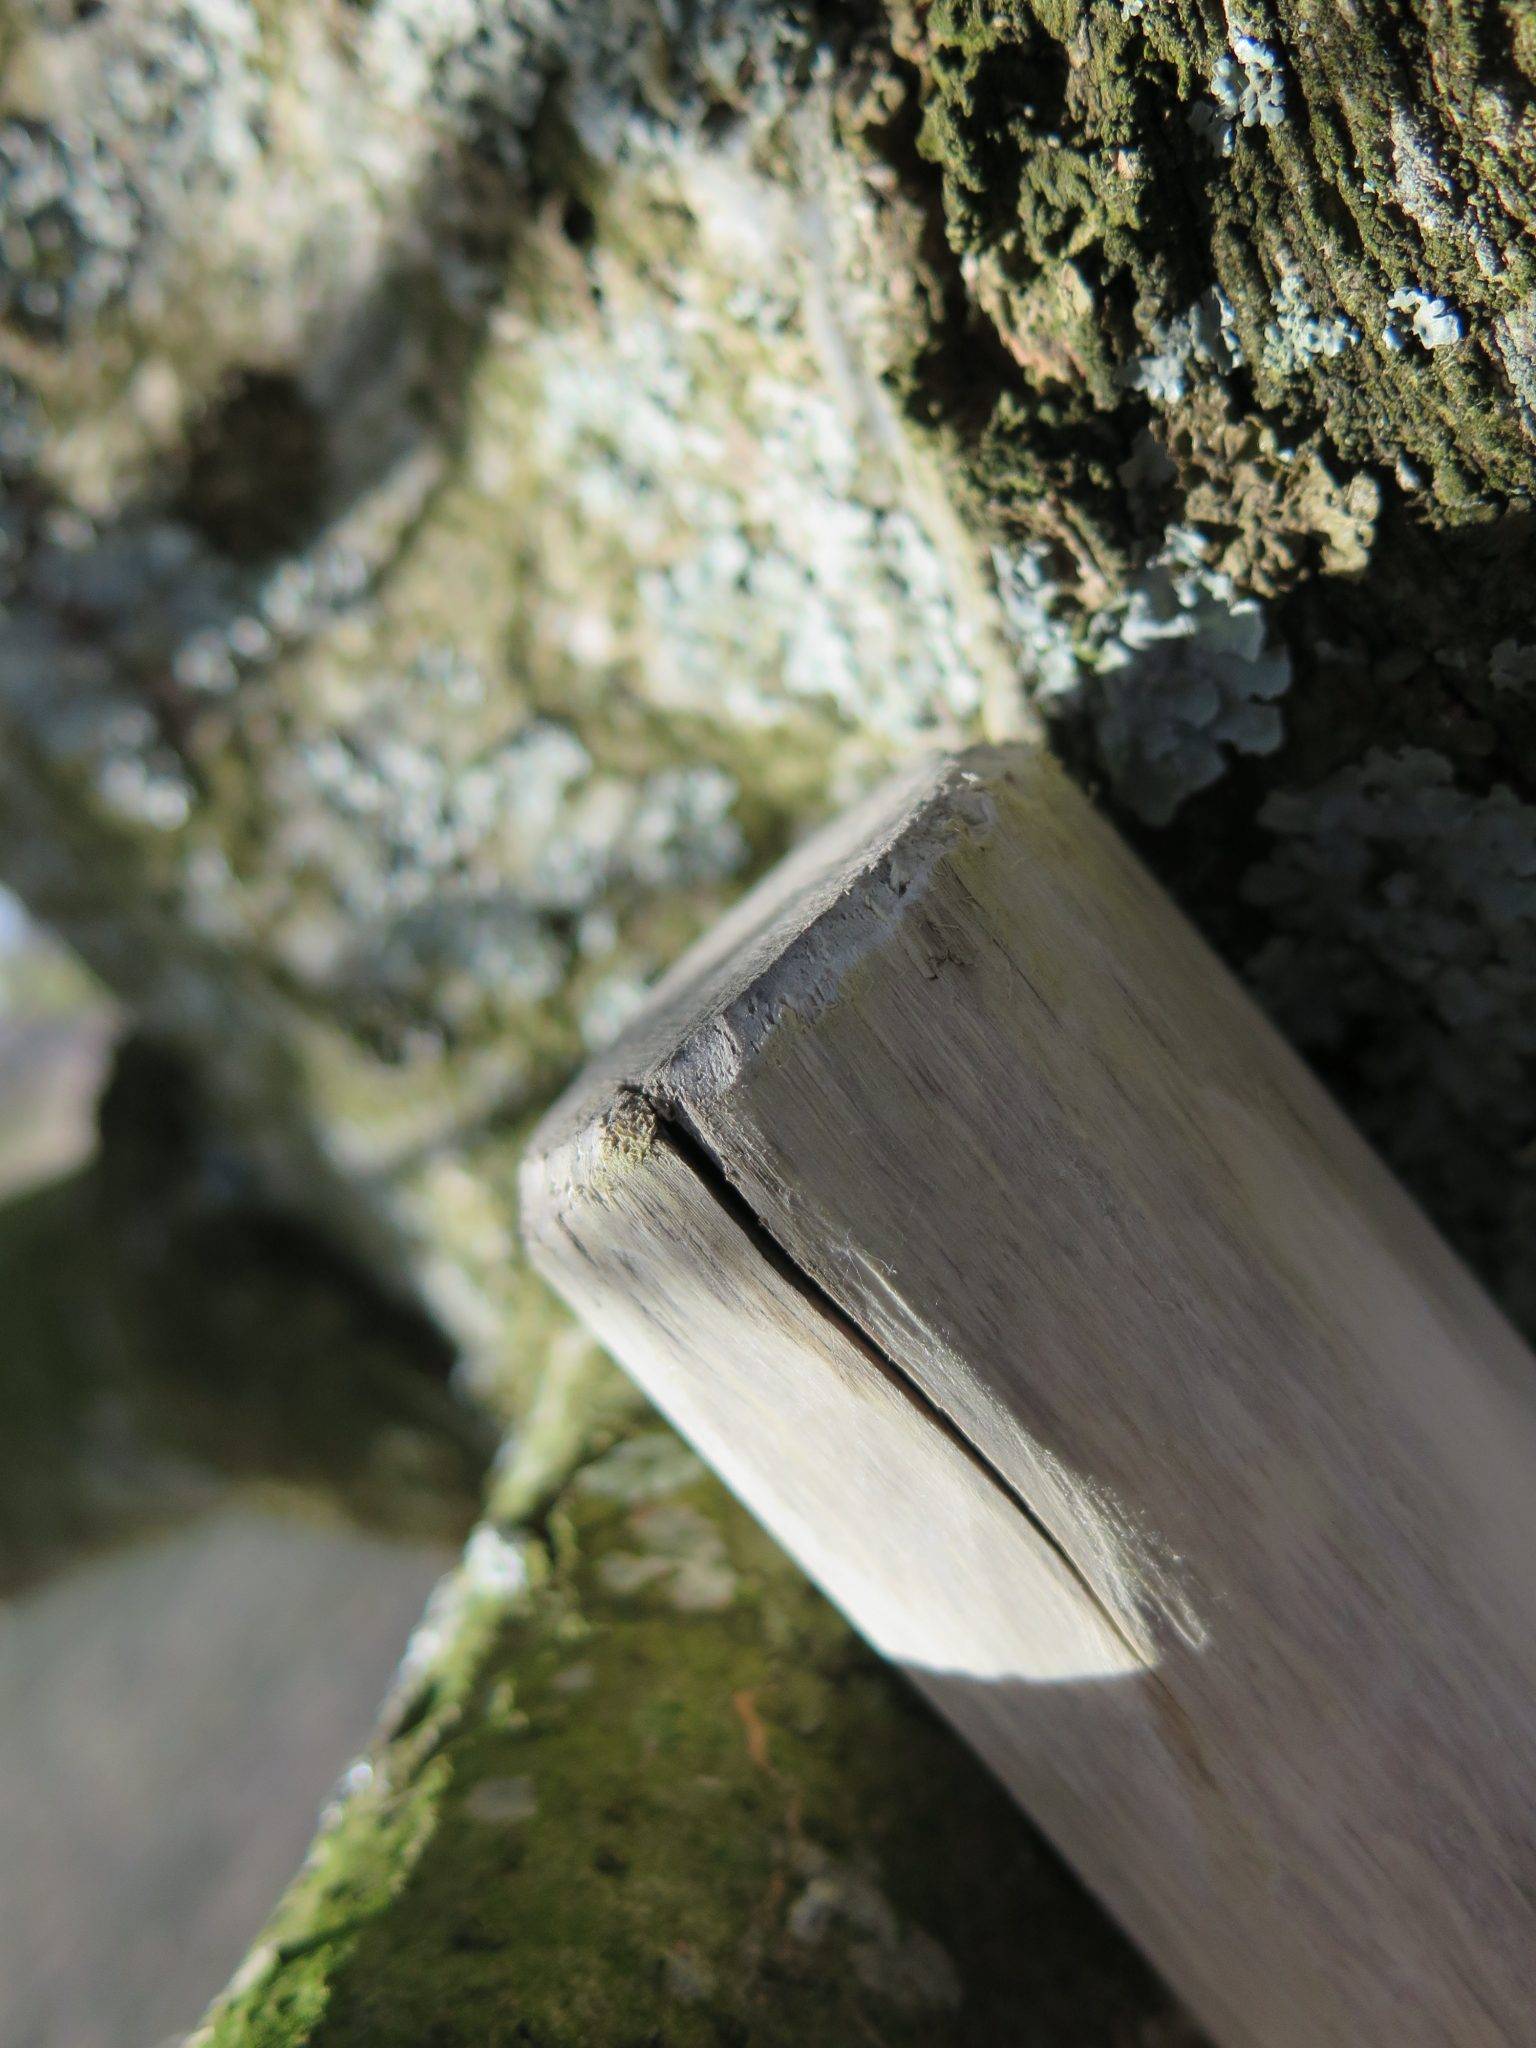
Whittling an angle on the top and bottom of a walking stick stops the wood from splintering.
Fresh, moist bark is always easiest to remove, so whittle this off as soon as you have your wood. Hold one end of the stick in your hand as you sit, with the other end angled down to rest on the ground. Set yourself up like this outdoors and it’ll save you from a lot of sweeping. Take long, even strokes downwards with your knife to remove strips of bark without going far into the wood. The only time you want to remove actual wood is when you’re leveling knots.
The nice thing about carving fresh wood is that it provides incentive. The more bark you remove, the more bright, clean, pure looking wood you’ll expose. It’s addictive.
With all bark removed, set the stick aside standing upright in a corner somewhere for 2 to 4 weeks to dry. The wood will be lighter in weight and better able to accept refined carving after it dries, but it may also be browner than it was before. This happens if white inner bark got left behind before and dried. Whittle away this new brownness until you get down to nice, light wood. Whittle an angled edge around the top and bottom ends of your walking stick so the wood won’t splinter during use.
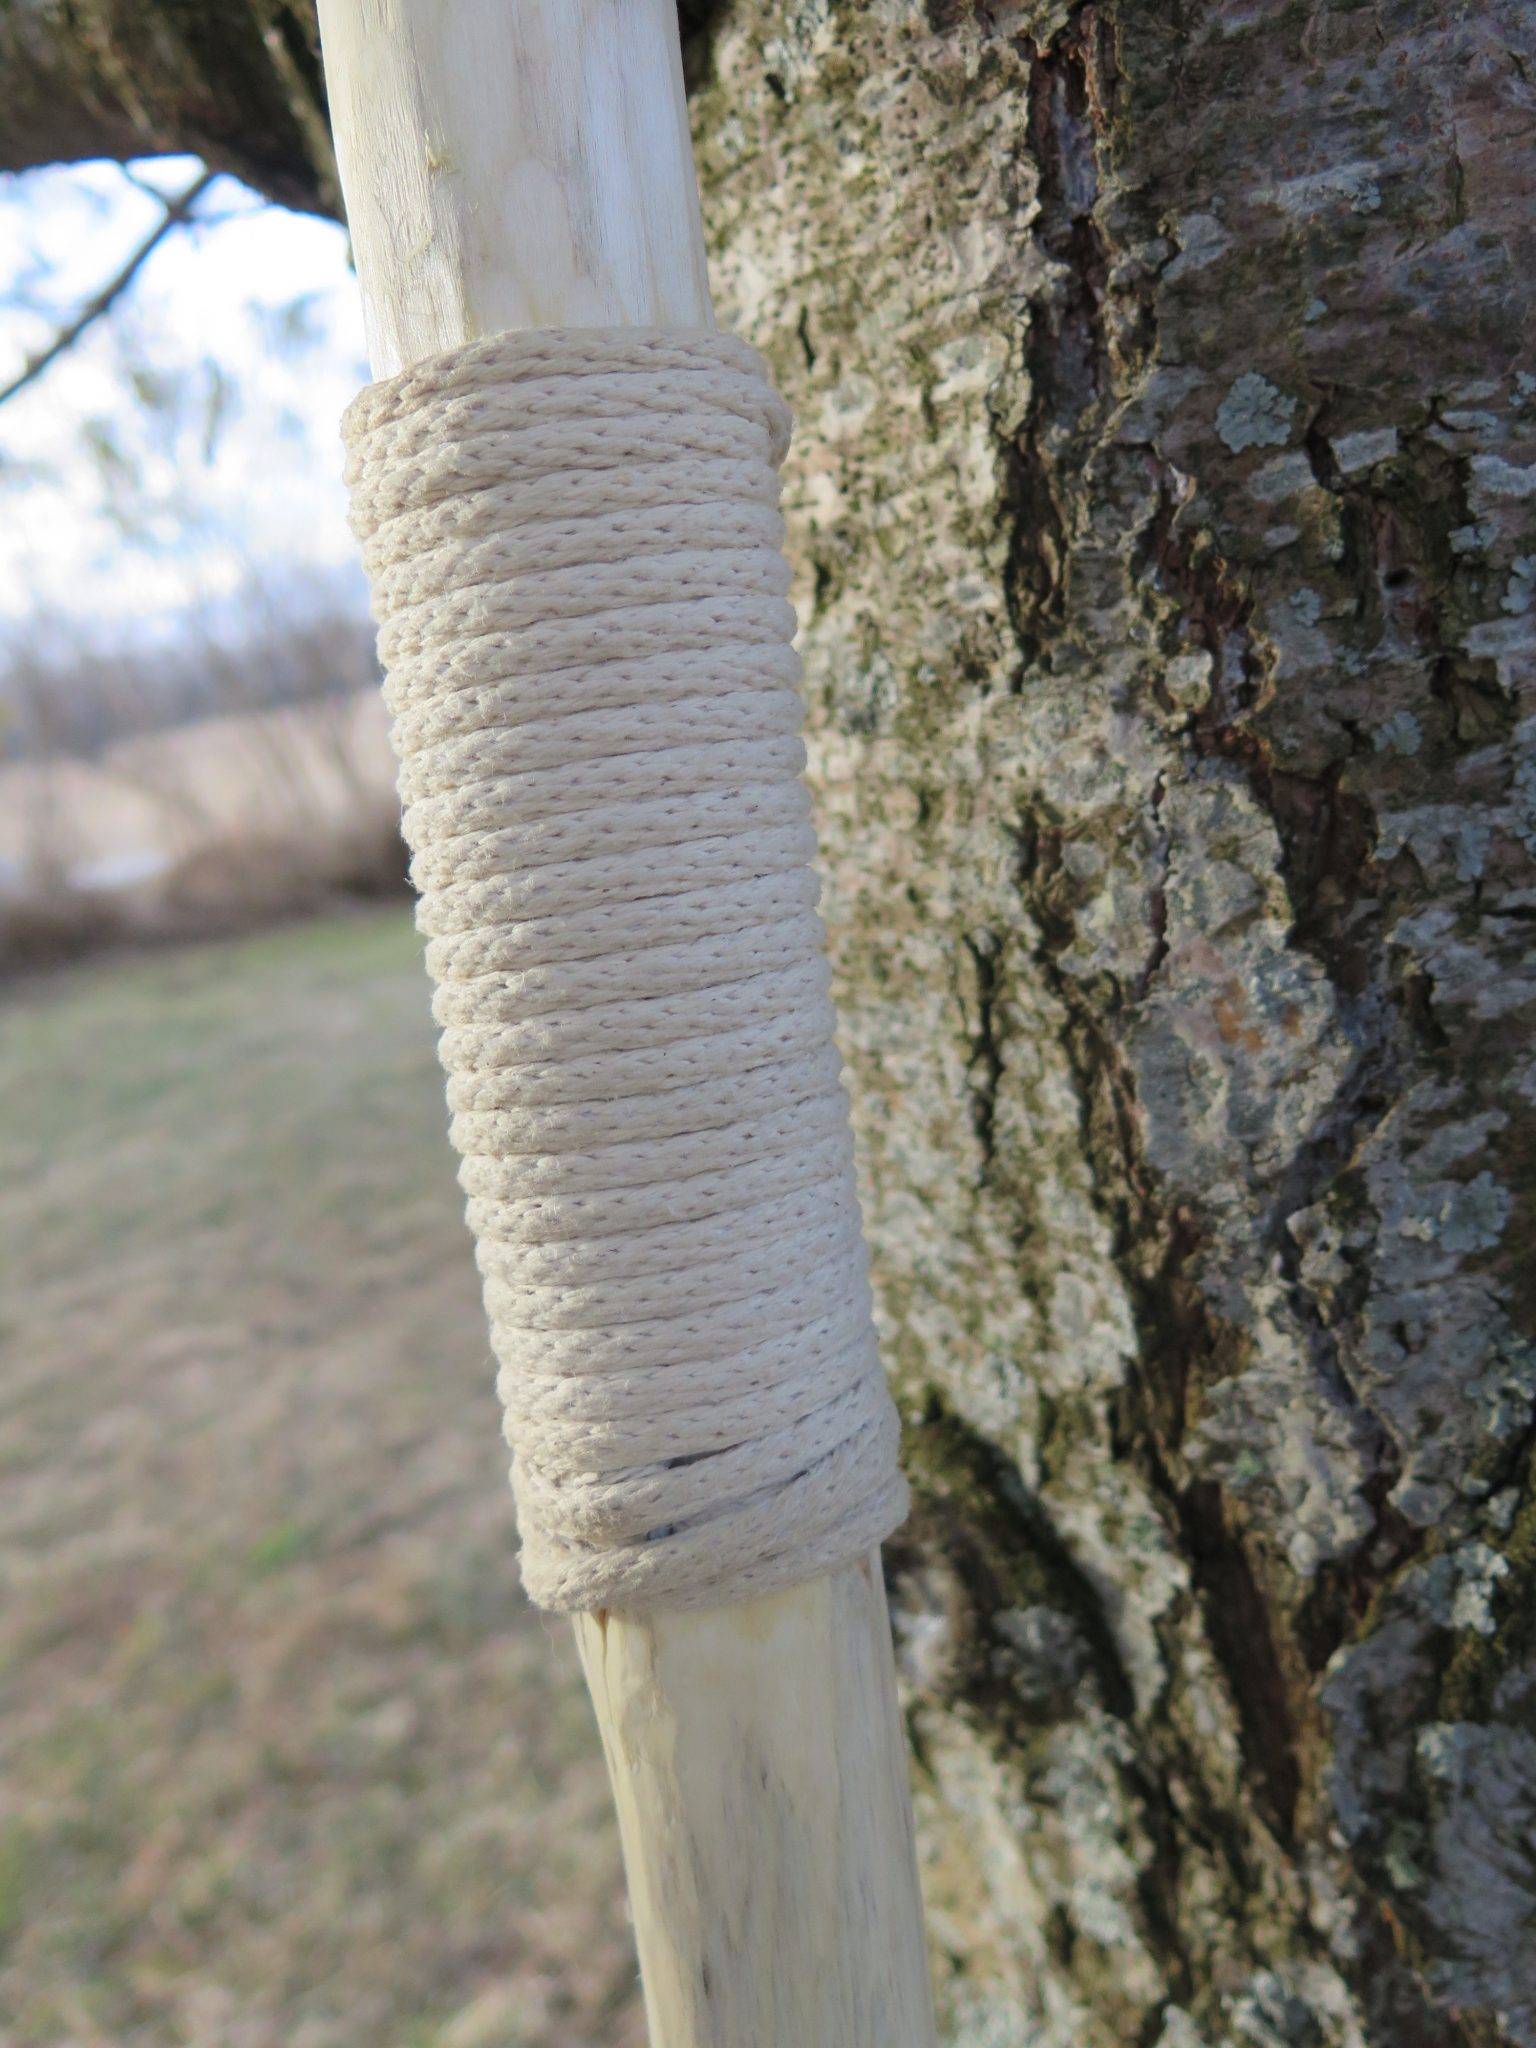
Soak sash cord in water then wrap it tightly around the top of the stick for a handle grip. The cord tightens as it dries.
It’ll take a couple of months of sheltered storage for your walking stick to dry completely, but you can go ahead and wrap a rope handle grip on top, if you want. I buy sash cord from a hardware store for this. Soak it in water, tuck one end under the first wrap, continue wrapping to create a 5” or 6” long hand grip, then tuck the loose end under the final wrap and pull it tight. When the cord dries it’ll get even tighter.
Mark your initials somewhere on the stick, coat it with linseed oil or wipe-on poly, then grab your trusty walking companion whenever you head out for exercise. Expect compliments.
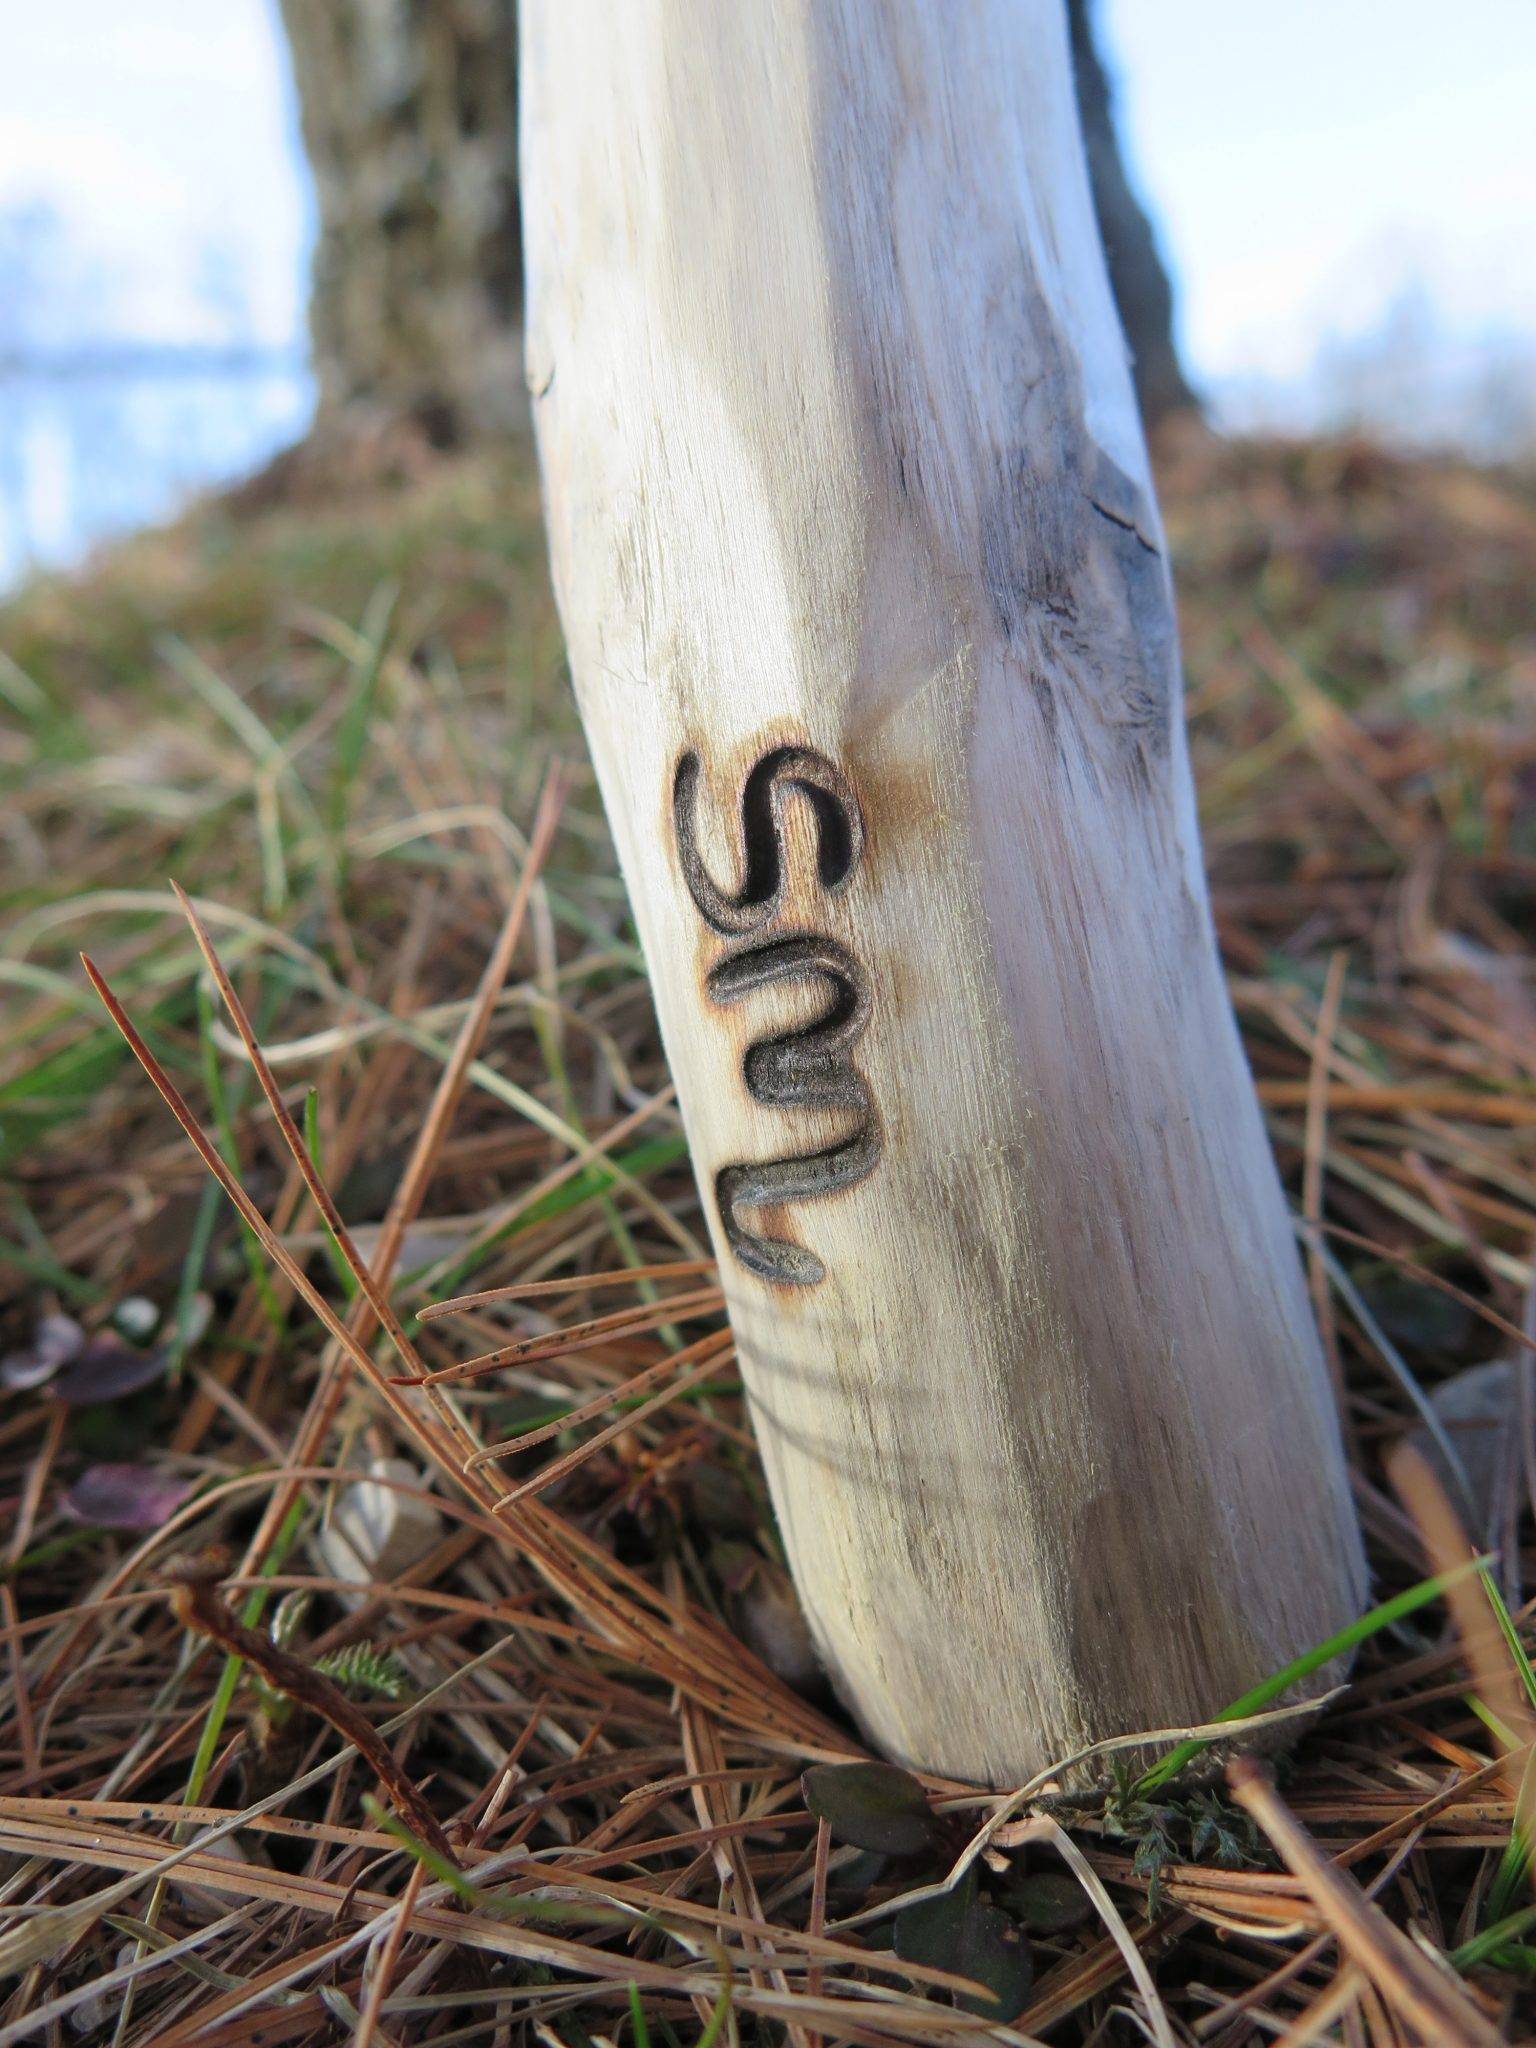
Piano wire can be bent into letter shapes, heated and used to burn initials like this into a walking stick or any other kind of woodwork.
Related posts:


Steve Maxwell and his wife Mary live on a 90-acre modern homestead on Manitoulin Island, Ontario in a stone house they built with local materials beginning in 1985. Steve is Canada’s longest-running home improvement and how-to columnist and editor of Home and Property. He divides his time working on the land, building things large and small, and creating articles and how-to videos that teach sustainable, self-reliant, hands-on living skills.